3. Installation Guide
Before installing Odin1, please read the following precautions:
-
Clean the mounting surface and optical window:
- Before installation, make sure to remove dust, oil and other contaminants from the mounting location and the LiDAR optical window. We recommend using a clean air blower to remove dust first, then gently wiping the window with a lint-free cloth (such as a lens cloth) lightly moistened with clean water to ensure complete cleanliness. Residual stains will affect measurement accuracy.
-
⚠️ Make sure the field of view is unobstructed:
- During installation, no obstructions are allowed within the sensor’s field of view (FOV) area in front of it (within 0.2 m). Pay special attention: even transparent materials such as glass or acrylic plates installed directly in front of the sensor will significantly interfere with the laser signal and degrade performance.
-
Flexible mounting orientation (with optimization tips):
- The product supports installation in any orientation (including upside-down). When mounted upside-down, the bottom of the device should be at least 0.2 m away from any object to ensure best performance.
- The device automatically adapts to the mounting attitude (e.g., upside-down or tilted), and the internal sensors will be calibrated accordingly.
-
⚠️ Do not apply additional load:
- The device’s body (especially the heat-dissipating housing and the optical window) cannot withstand additional weight or pressure (e.g., stacking objects on it or pressing it forcefully). Please secure it only via the designed mounting interfaces (such as the threaded holes on the bottom).
-
⚠️ Ensure heat dissipation space:
- Sufficient space must be left around the device for heat dissipation. Requirement: the minimum clearance between the device body and surrounding objects (such as enclosure inner walls, cable bundles, etc.) must be ≥ 10 mm to allow smooth airflow and prevent overheating.
-
Stable mounting:
- It is strongly recommended to mount the device on a sturdy bracket, with the bottom of the sensor at least 0.2 m above any object to avoid blocking its field of view.
3.1 Mechanical Mounting
The bottom of Odin1 has 4 mounting holes plus 4 cooling-fan mounting holes, and there are 4 mounting holes on the side. Please refer to the dimensions and mounting hole sizes shown below to install Odin1 in the desired location.
| Back | Bottom |
|---|---|
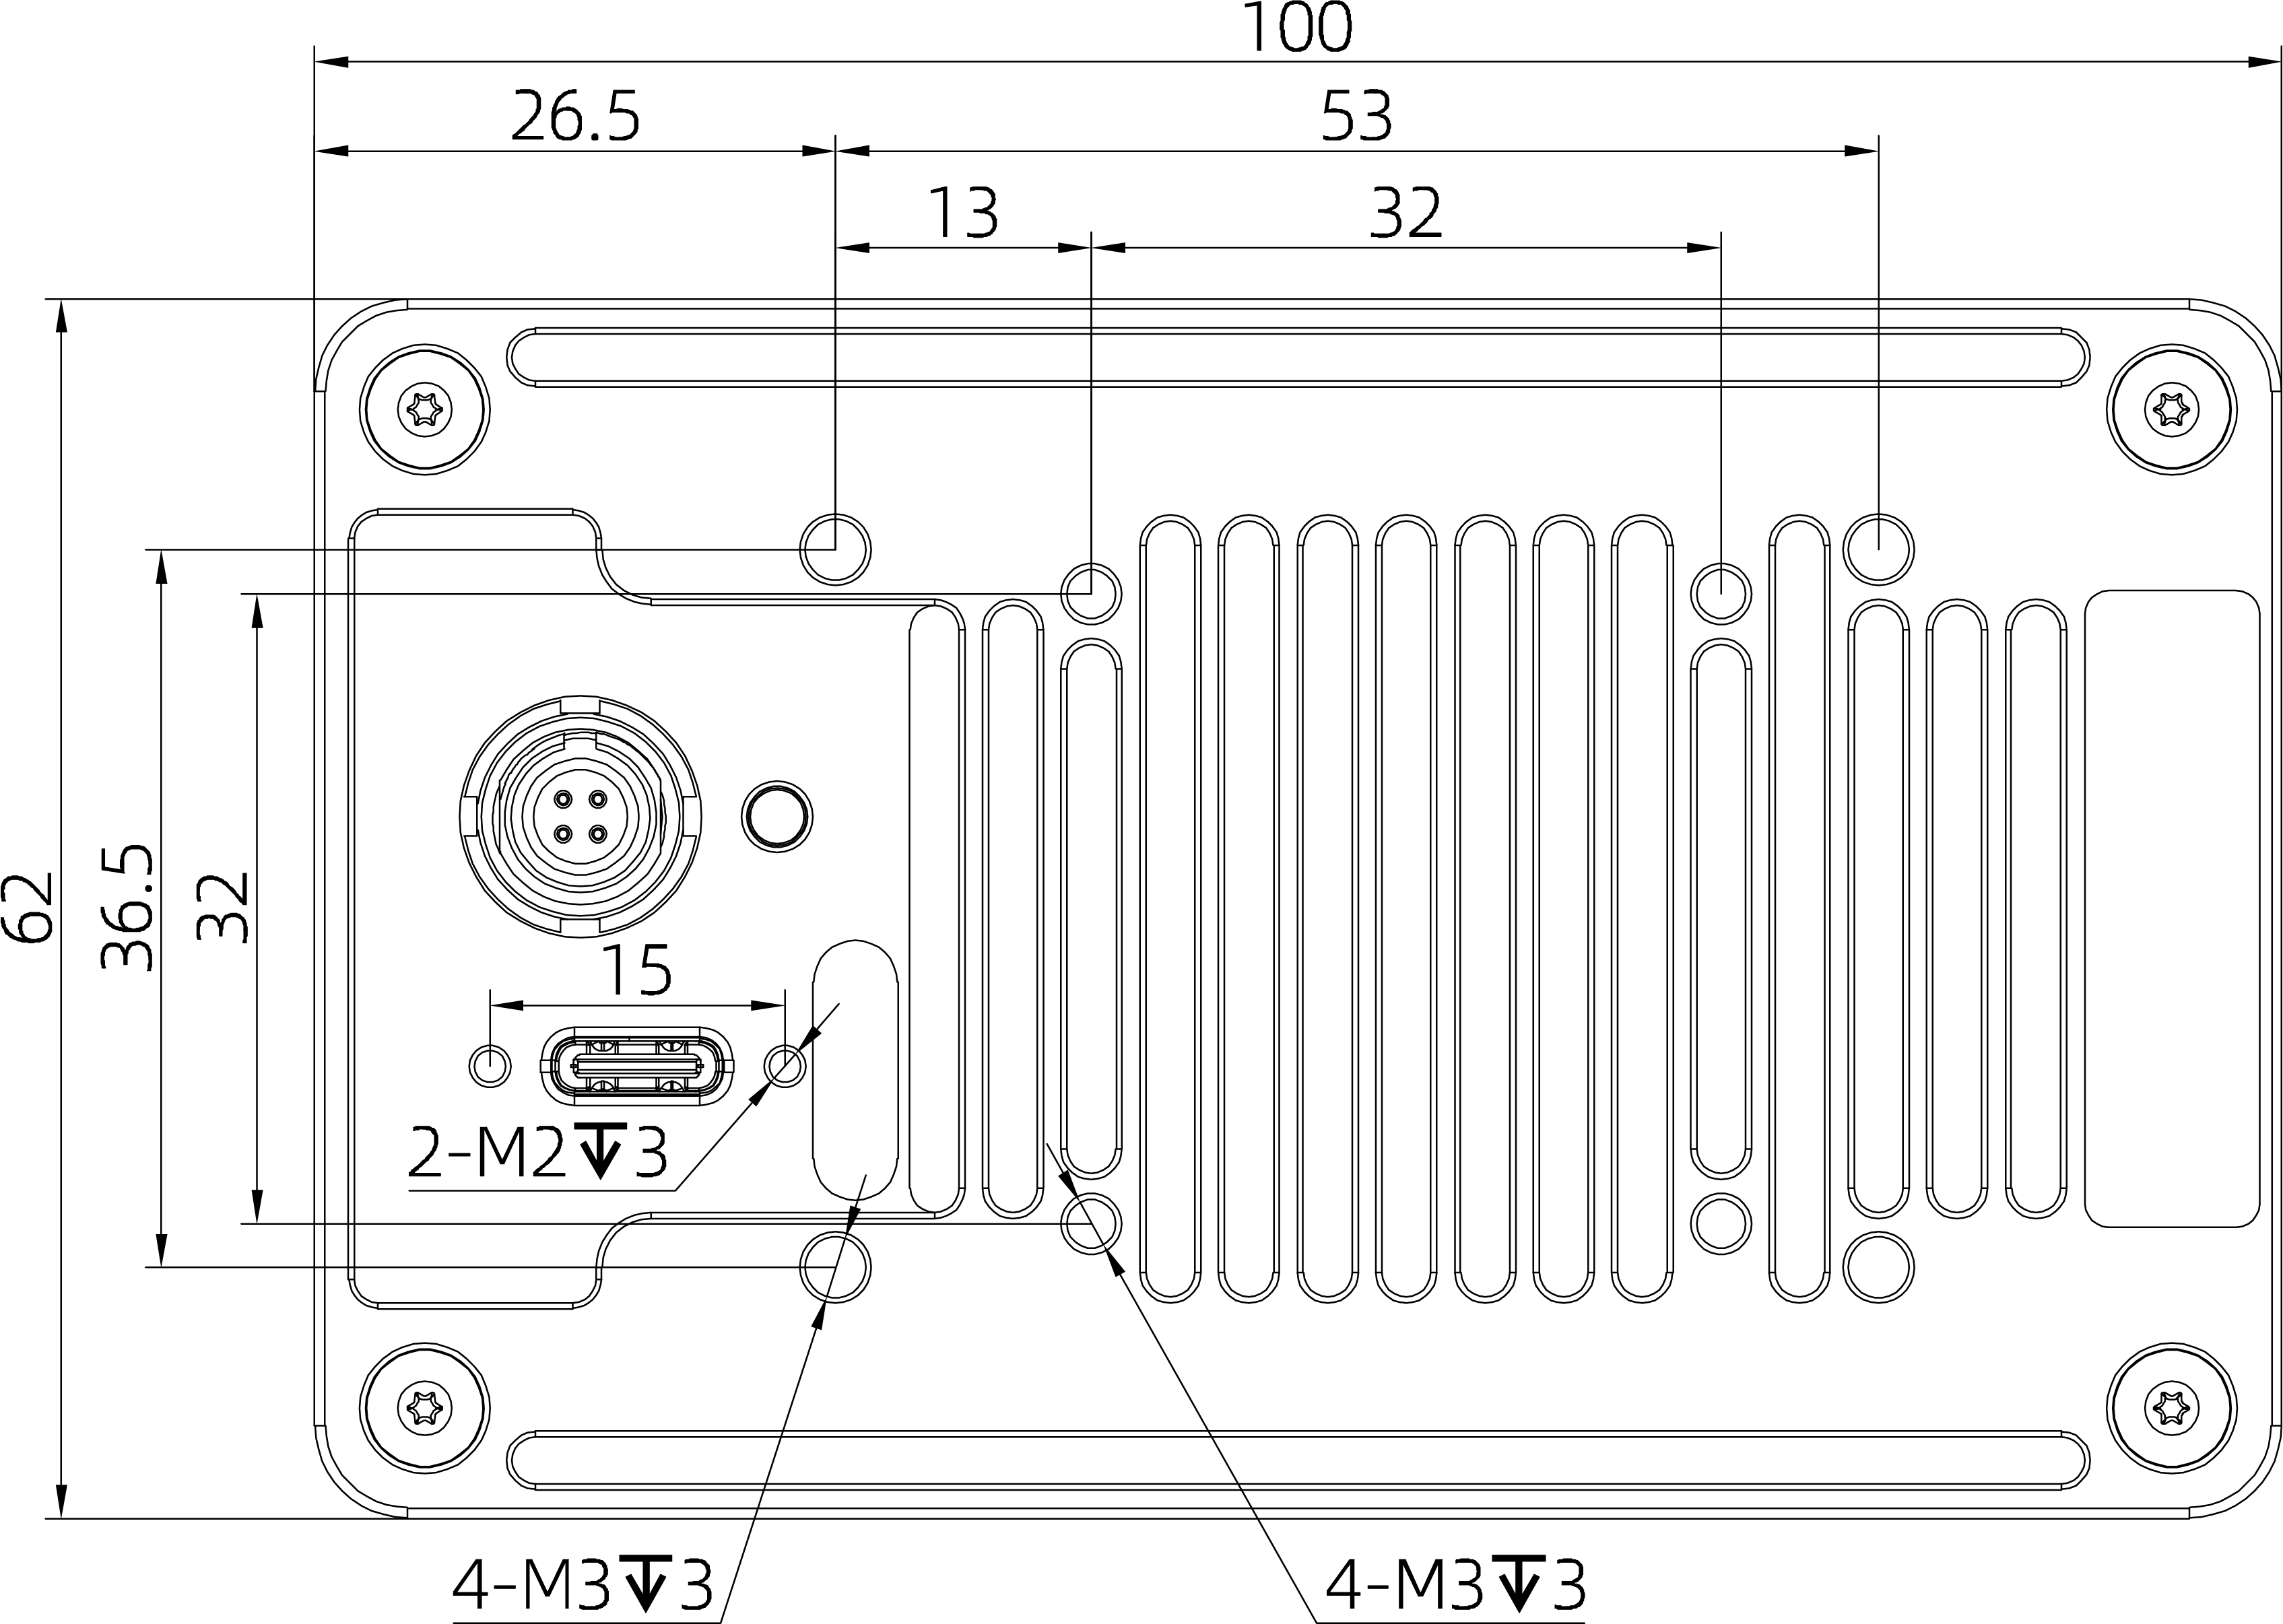 | 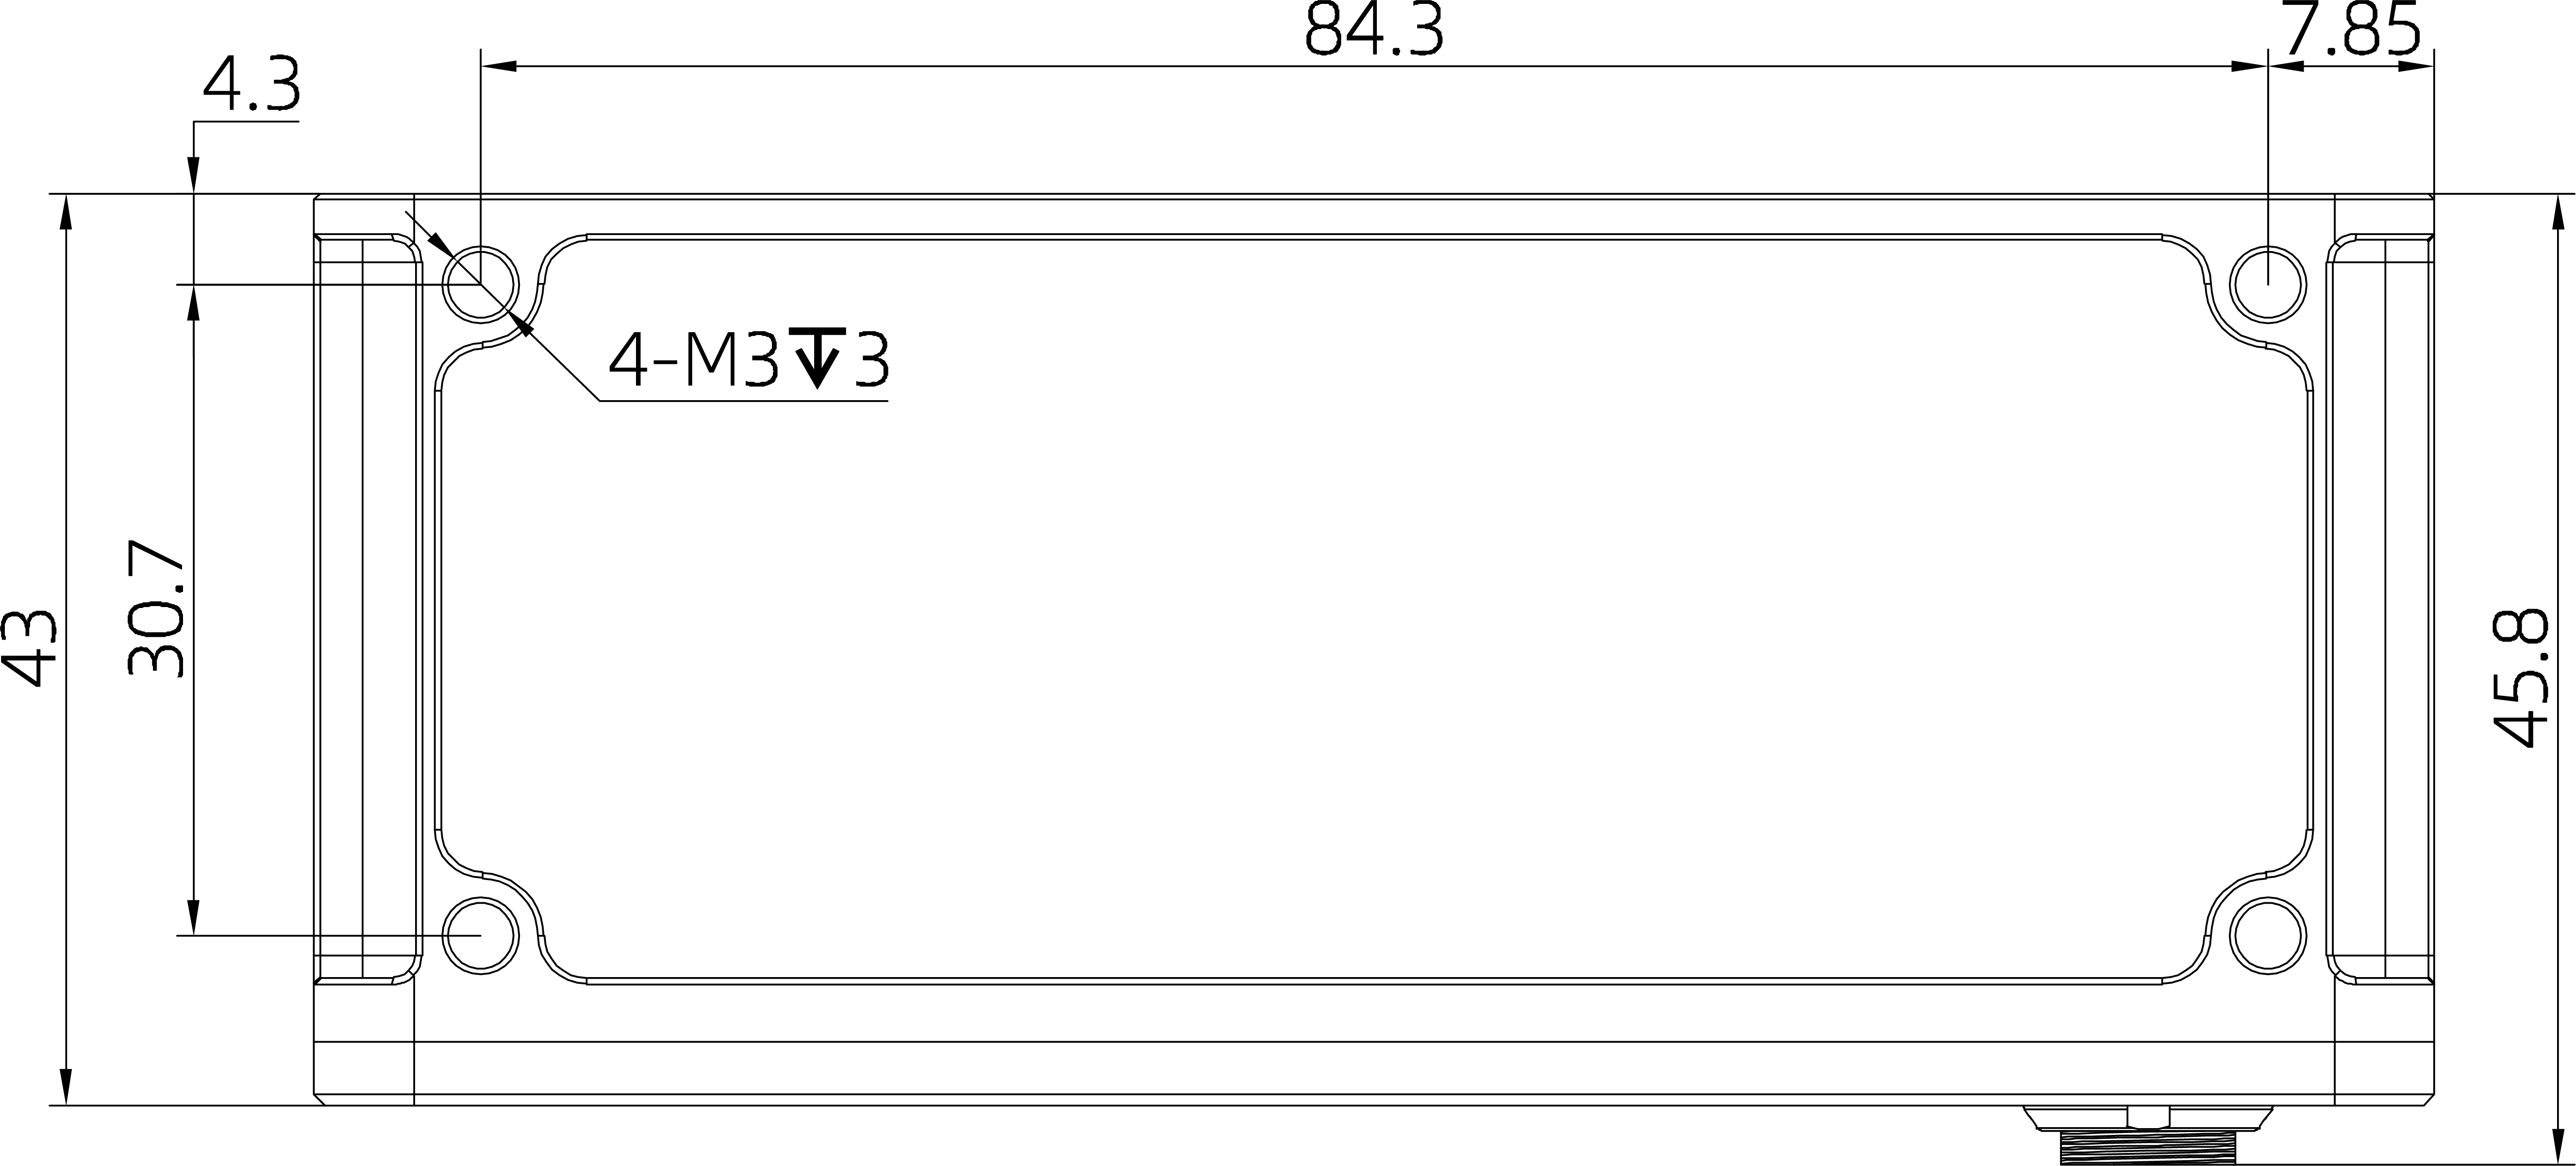 |
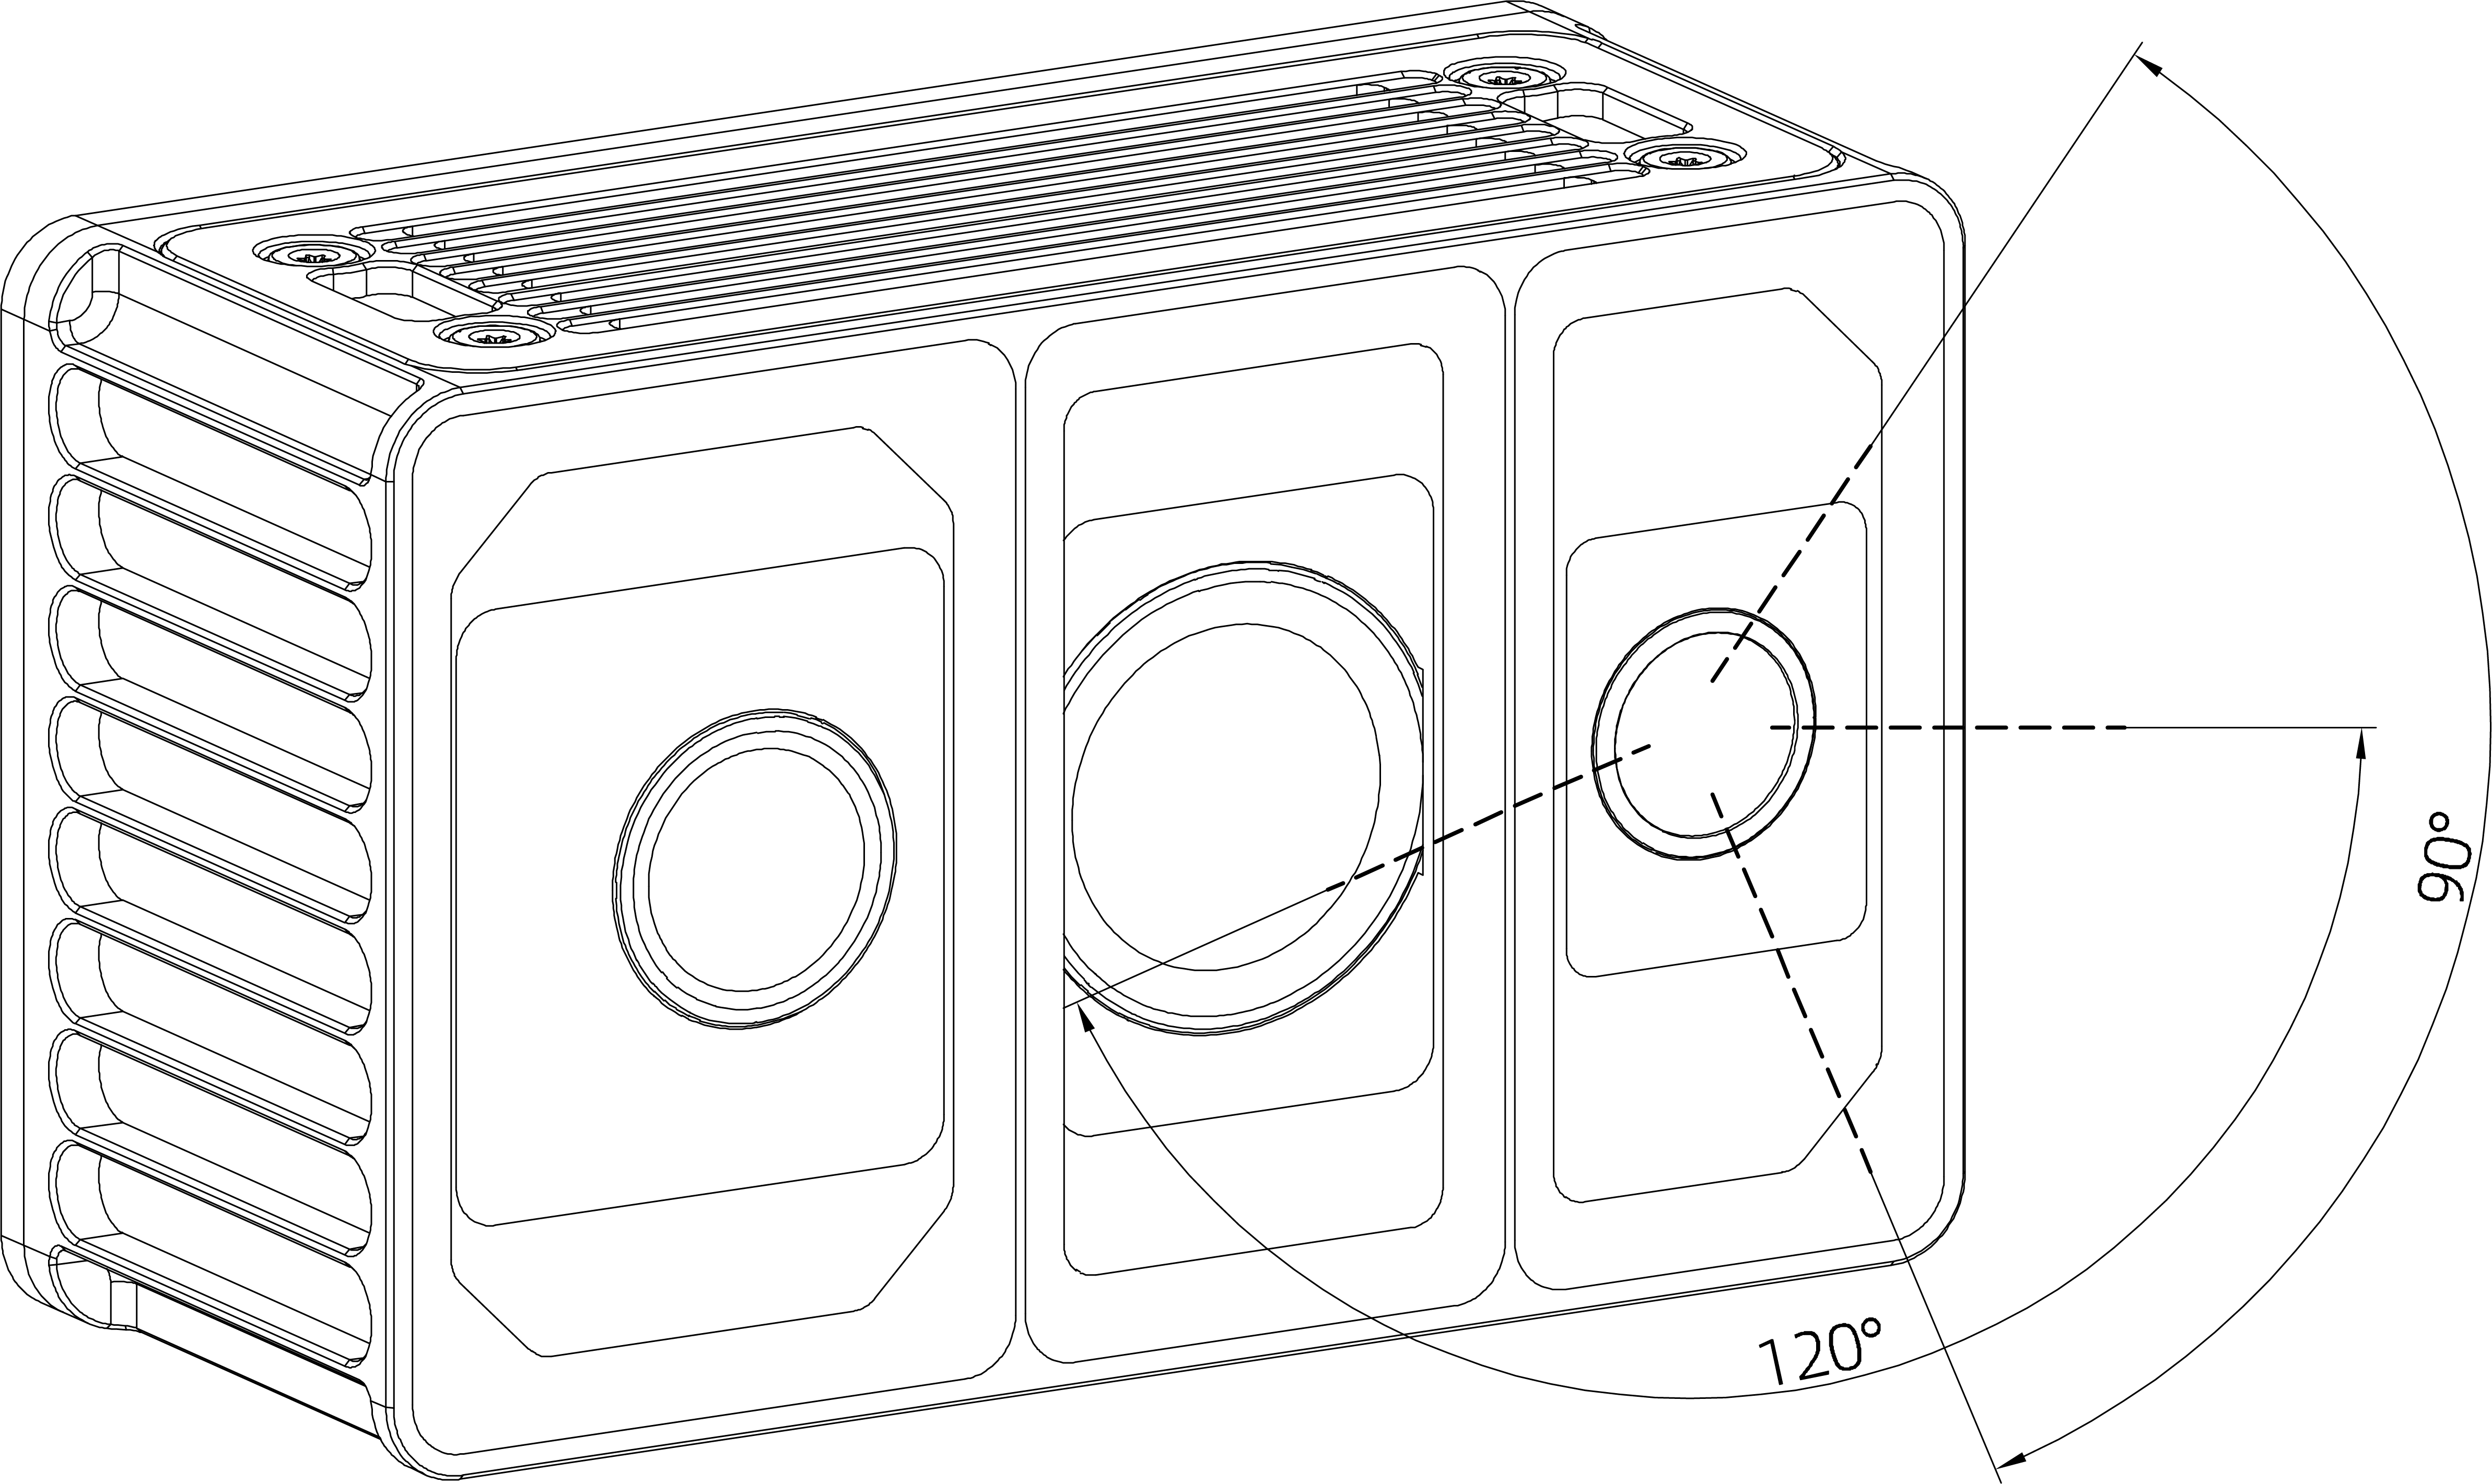
Effective field of view (FOV):
The depth FOV of Odin1 is approximately 120° H × 90° V, as shown below. When mounting, please pay attention to the effective FOV area and avoid blocking it.
| TX | RX | RGB |
|---|---|---|
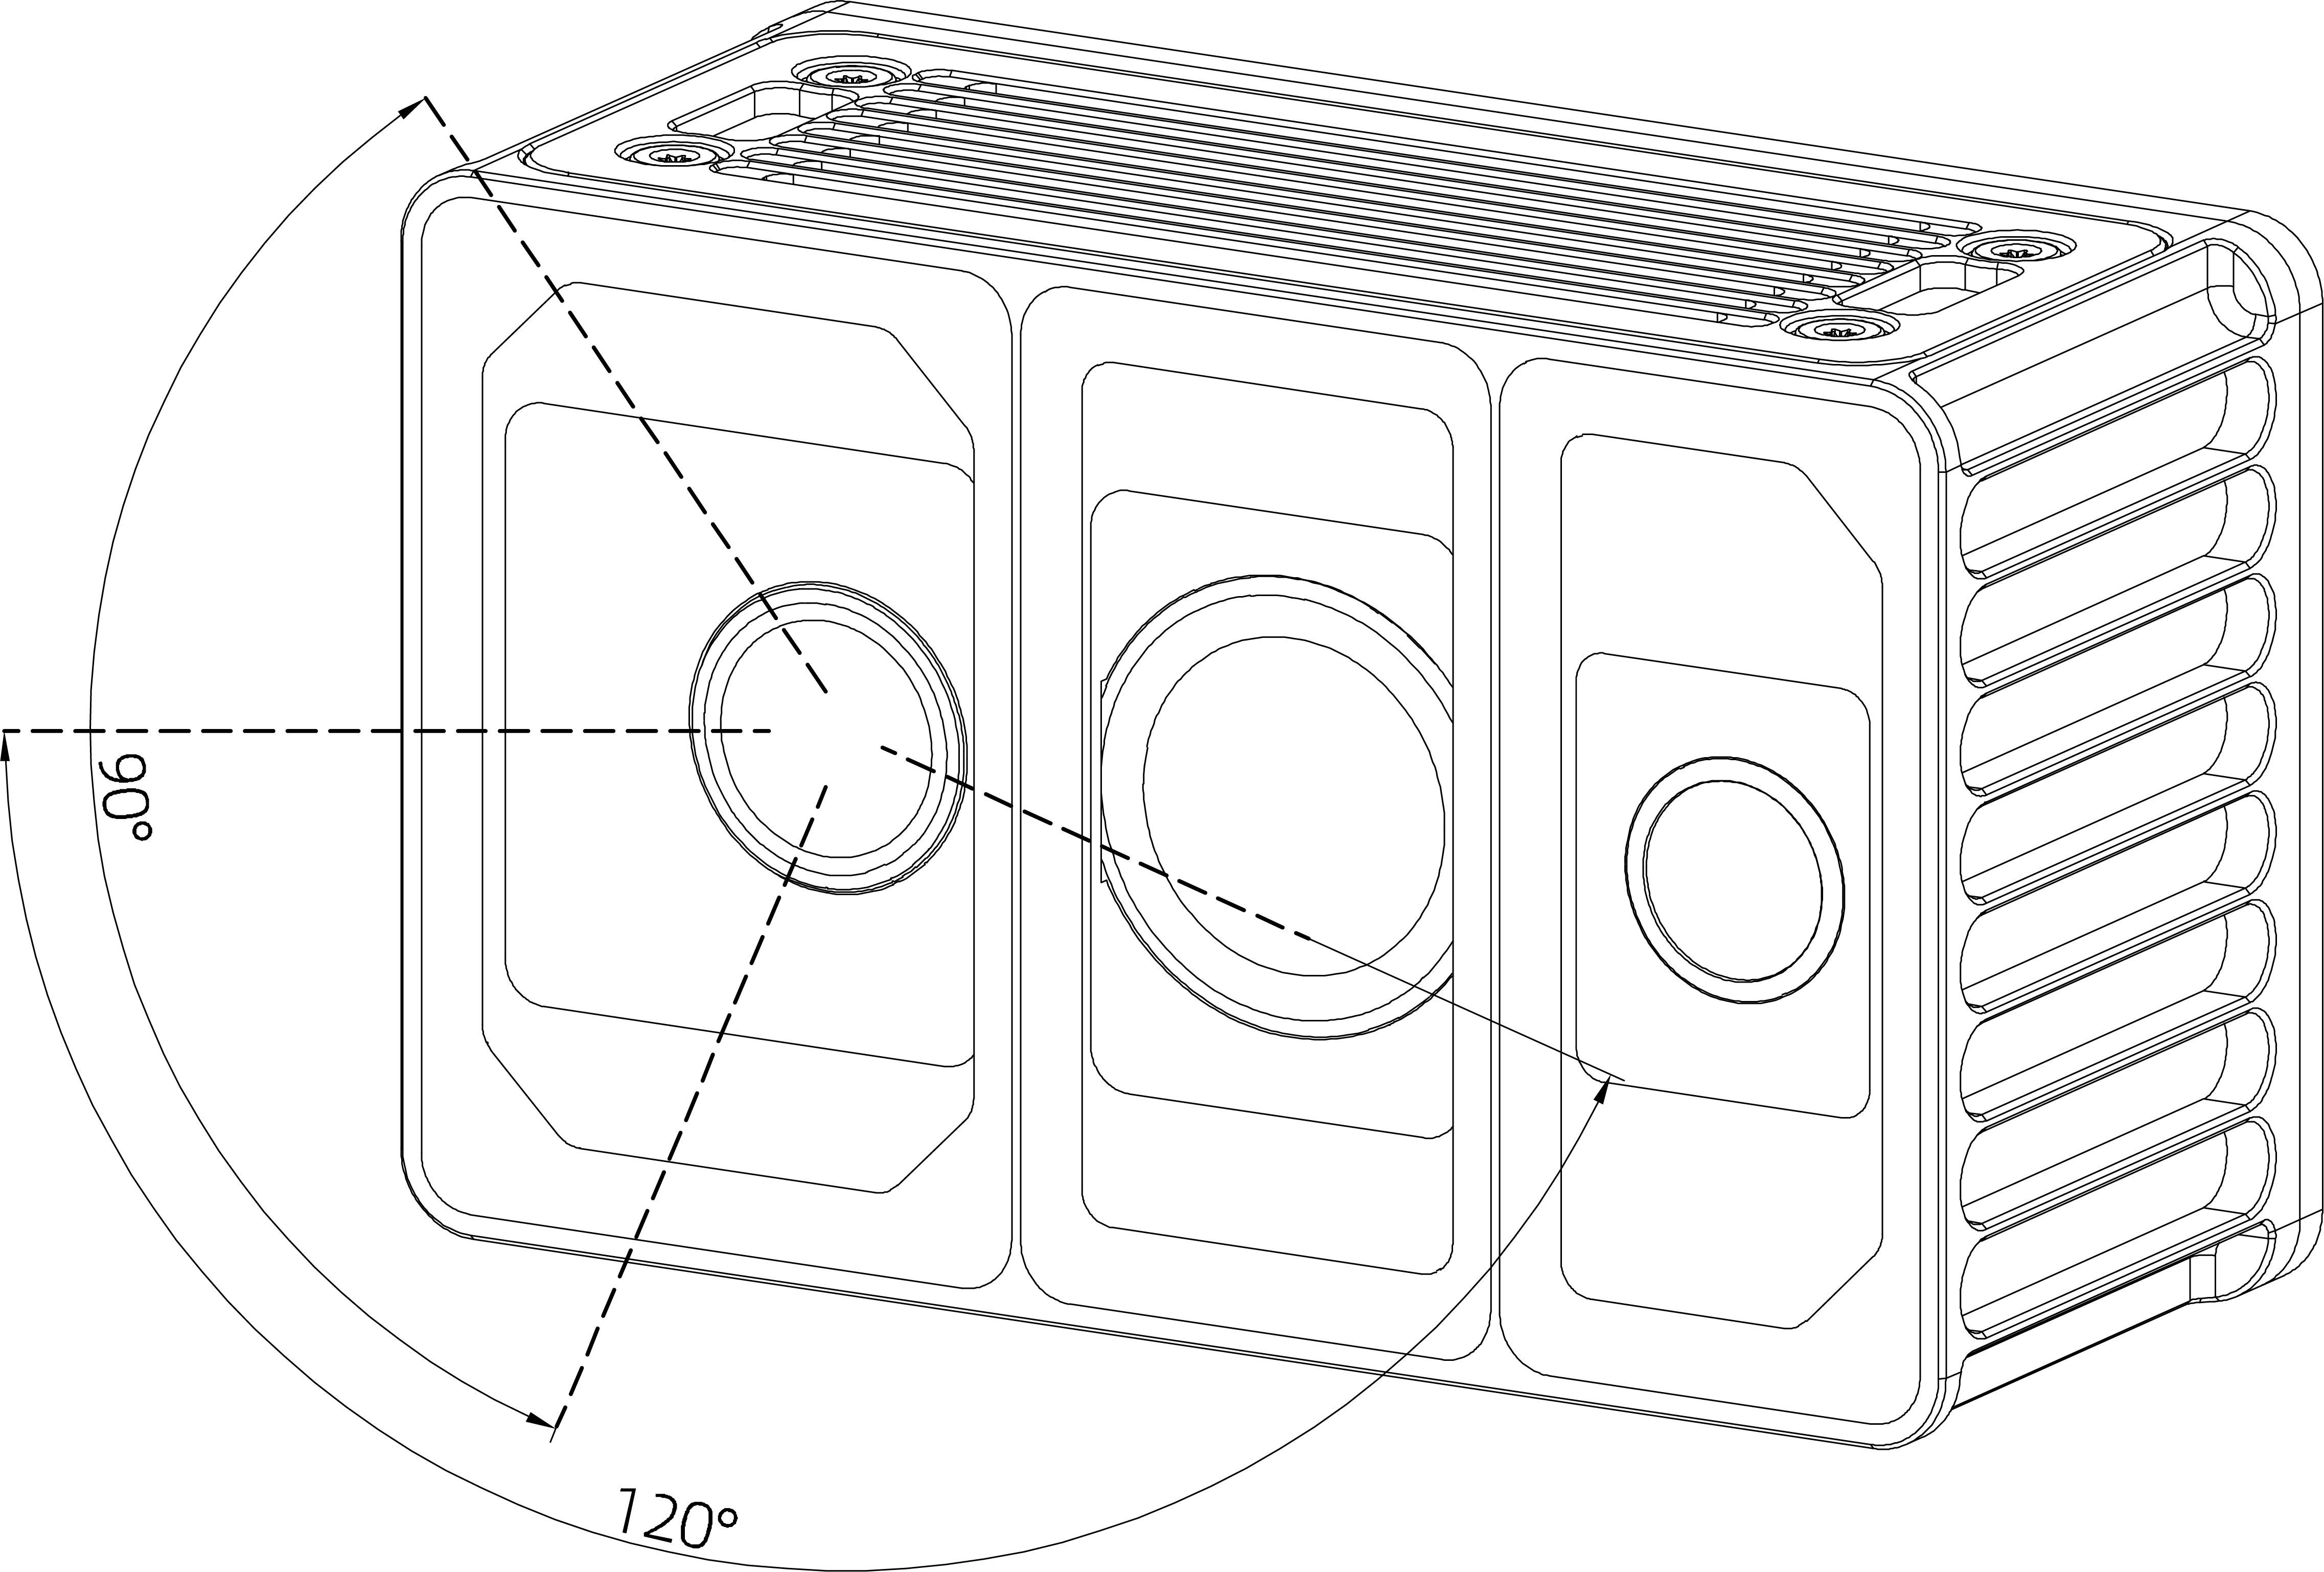 | 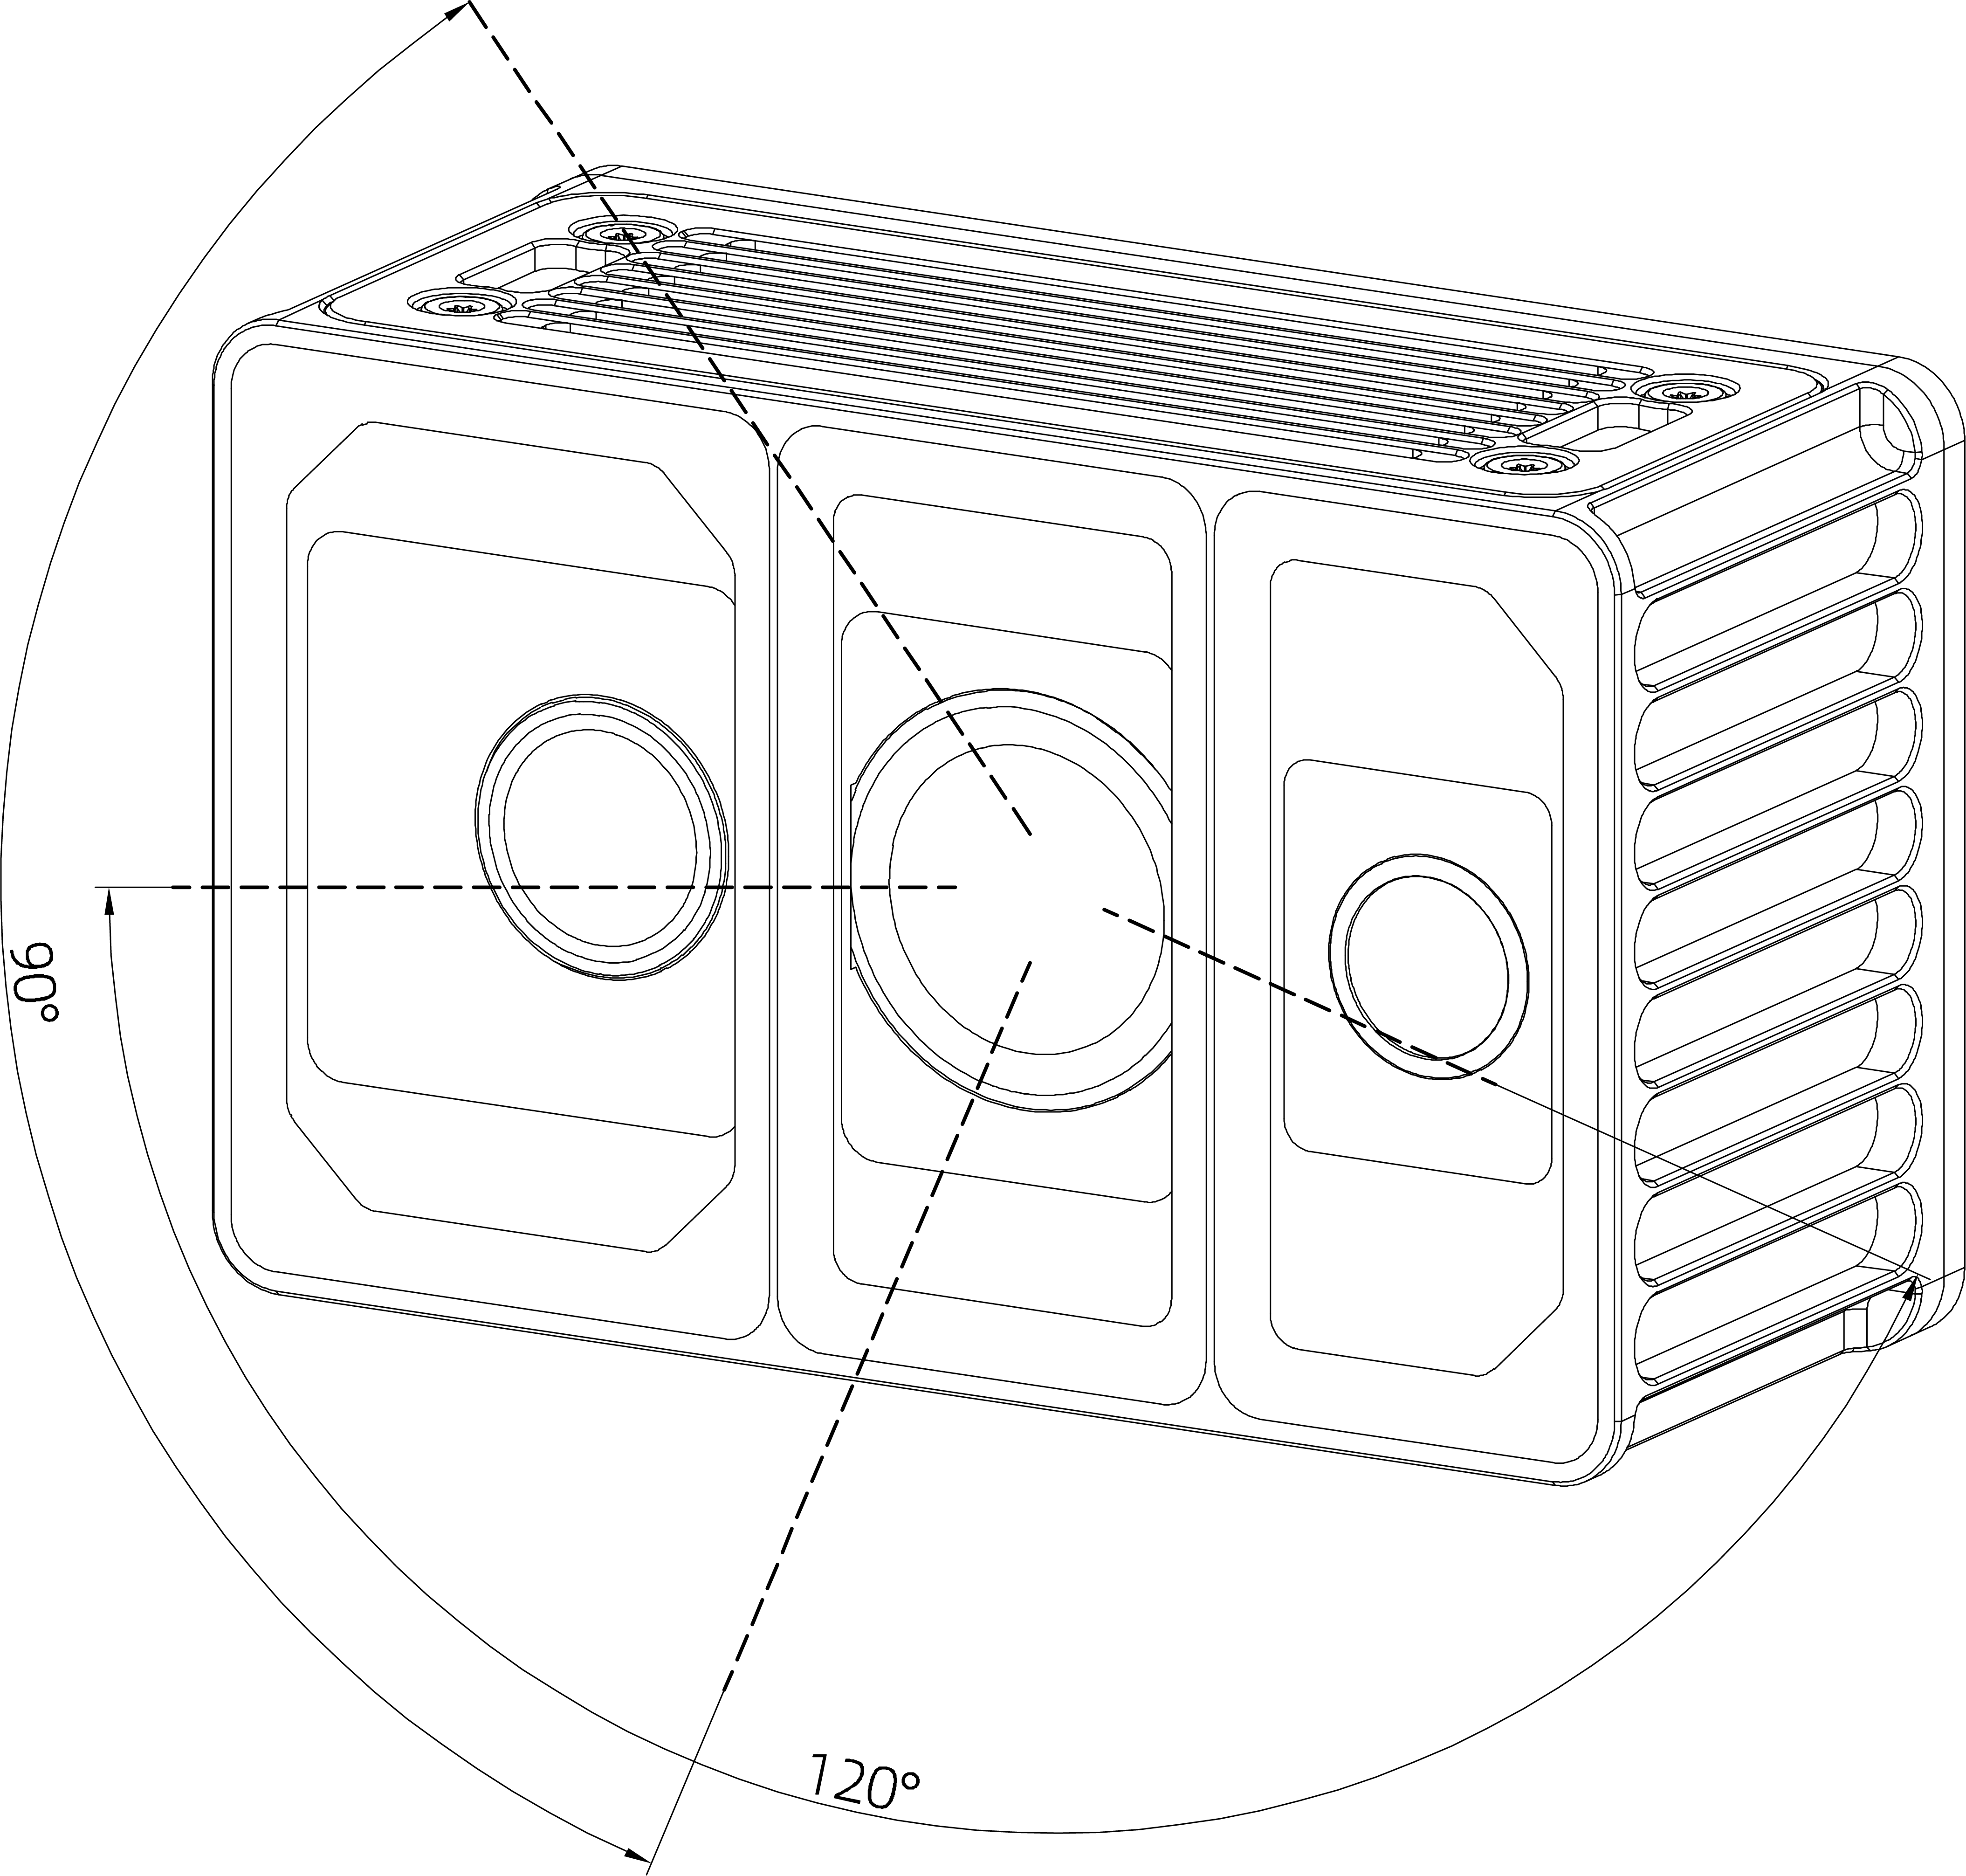 |  |
3.2 CAD Files
- Download Odin1 CAD file (stp)
- Download Odin1 housing-removed CAD file (stp)
- Download Odin1 FOV CAD file (stp)